
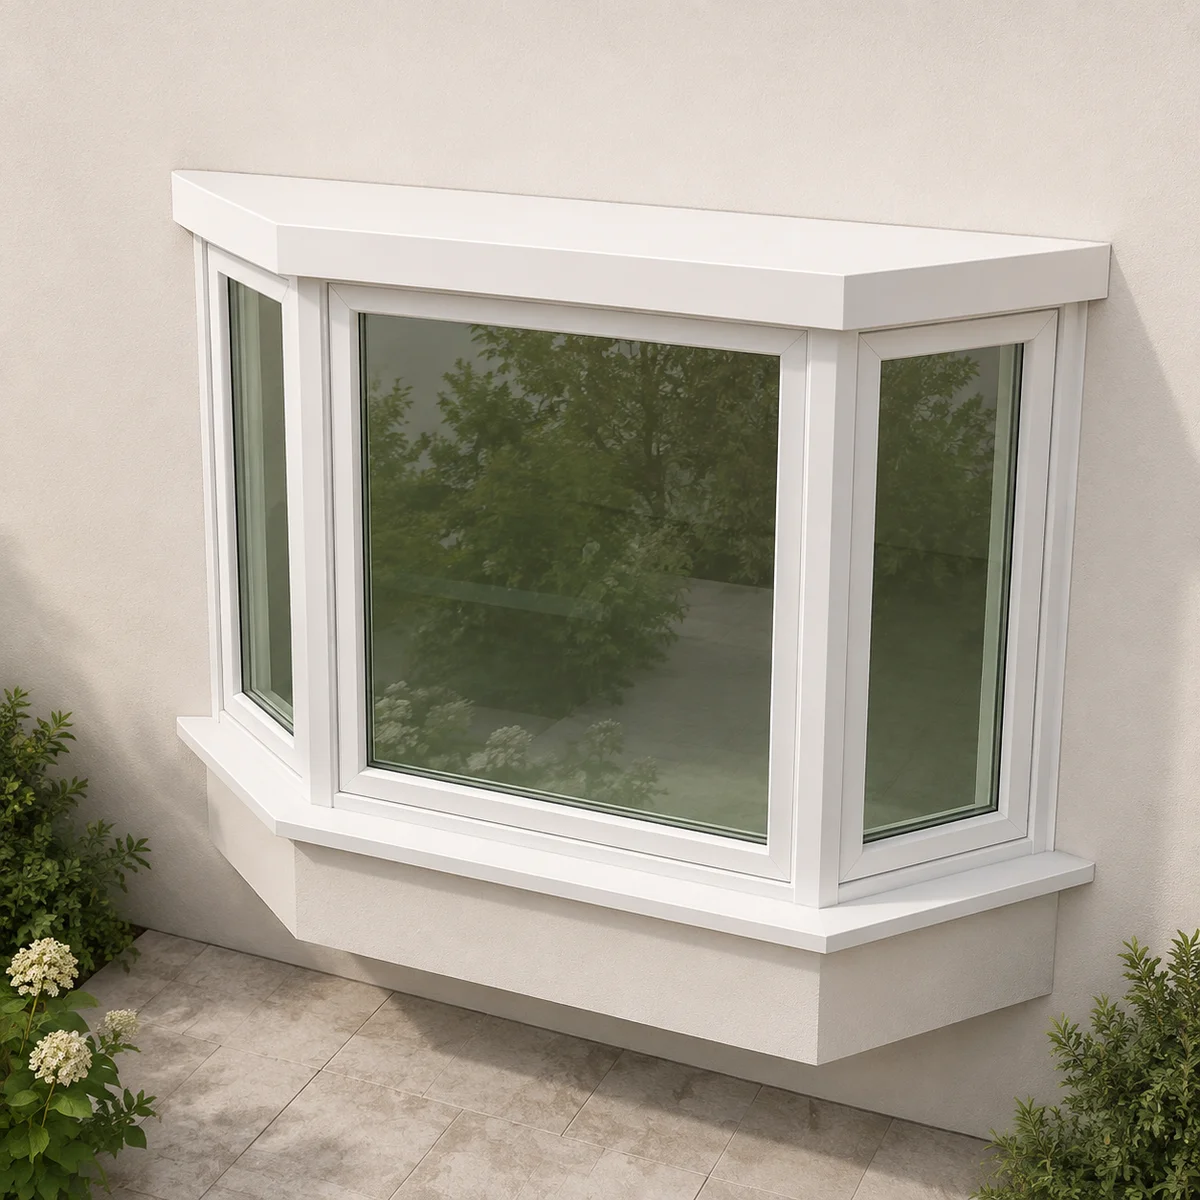
Is this the right window for your room?
Choose the centre and side sections separately: a fixed centre can frame the view while operable sides supply air. Projection depth also affects the interior ledge and how the window relates to the room.
Support, roof or cap details, insulation and exterior drainage need to be included in the design. Replacing a flat window with a projecting bay is a different scope from replacing an existing bay in the same opening.
How the design works
The finished result depends on the assembly around the glass. Ask about seat-board insulation, support below the projection and how flashing connects to the wall. Compare the complete installed scope, not three individual window prices.
| Detail | What to know |
|---|---|
| Operation | Angled projecting arrangement |
| Configuration | Fixed or opening side sections |
| Planning detail | Support and roof details matter |
| Typical application | Living and dining room features |
Construction of bay windows
A bay is an assembly that projects beyond the wall, usually with a larger central section and angled side sections. It adds depth inside the room, but the seat, head and side connections make it a construction detail as well as a window selection.
The centre can remain fixed while side units open, or another approved arrangement can be selected. Decide which parts need ventilation before choosing the proportions. An operable side casement must clear the exterior wall and any nearby obstructions.
Projection changes how the assembly is supported and protected from weather. The seat-board construction, insulation, roof or cap and flashing connections should be described separately from the glass and frame selections.
Hardware, support and everyday operation
The following components explain what to compare in this configuration. The order specification identifies the exact supplied parts; an option listed here is not automatically included in every unit.
| Component | Its role in your window |
|---|---|
| Operating side units | Choose the operator and lock for each opening section rather than assuming all three portions move. |
| Connections between sections | Joining components maintain the planned angles and must suit the approved assembly. |
| Support system | The support arrangement is project-specific and should be identified with the installation scope. |
| Head and seat details | These complete the projecting enclosure and need coordinated insulation and weather protection. |
Colours, glass, grilles and finishing choices
| Selection | What to decide for this style |
|---|---|
| Projection and angle | Choose the depth with the room layout and exterior elevation; do not infer it from a front-view photograph. |
| Centre/side proportions | A wider fixed centre emphasizes the view, while wider operable sides change ventilation and frame divisions. |
| Glazing consistency | Coordinate tint, coatings and privacy across all sections, with suitable ratings for each selected unit. |
| Grilles | Confirm how patterns meet across angled corners and whether they align with other front-elevation windows. |
| Seat and trim | Specify the visible seat finish, jambs and casing, including how the new work meets the existing wall. |
| Roof or cap | Include the exterior top finish and flashing; it is not automatically included in a basic unit price. |
Installing bay windows
Replacing an existing bay in the same opening is different from converting a flat wall opening into a projection. The conversion can introduce support, exterior finish and structural work that a like-for-like price does not cover.
Review a section drawing showing the head, seat, projection and wall connections. At handover, inspect the finish around the assembly and operate each moving section. Ask which parts of the completed scope are covered by the product and installation documents.
Performance of the selected assembly
A universal rating is not assigned to bay windows. The component windows and the projecting enclosure must be reviewed together; a component rating does not describe the support, roof and seat construction.
Watch and compare in person
Explore the showroom overview to see the scale of the displays, then try the relevant opening style during your visit. Individual product-operation footage will be added after the dedicated filming; a showroom overview is not a demonstration of this exact configuration.
A look at the production setting
A short view of window assemblies and equipment on the manufacturing floor. This is background context for the product conversation, not a complete account of every production stage.
Read the silent video description
The camera moves through a manufacturing area with window assemblies, equipment and workstations. This silent overview shows the setting rather than a step-by-step production tutorial.